
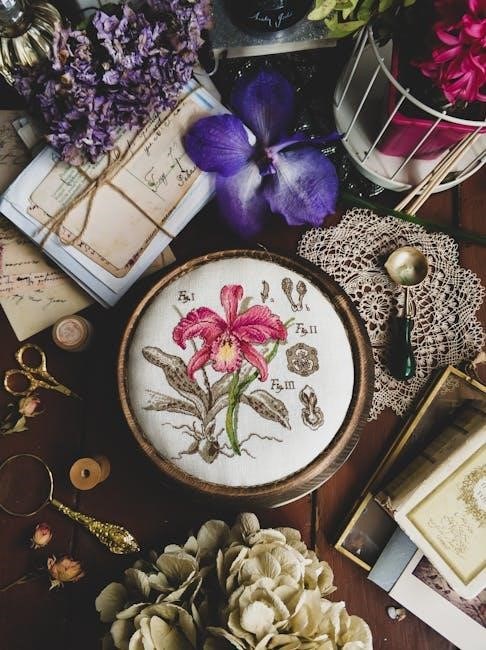
Needlepoint is a delightful and ancient art form‚ offering creative expression through stitching yarn onto canvas‚ resulting in beautiful textured designs․
Historically‚ needlepoint evolved from various embroidery techniques‚ gaining prominence in medieval times for embellishing religious textiles and household items․
To begin‚ gather essential materials: canvas‚ yarn (Persian wool‚ silk‚ or crewel)‚ needles‚ and scissors – tools for bringing your vision to life․
What is Needlepoint?
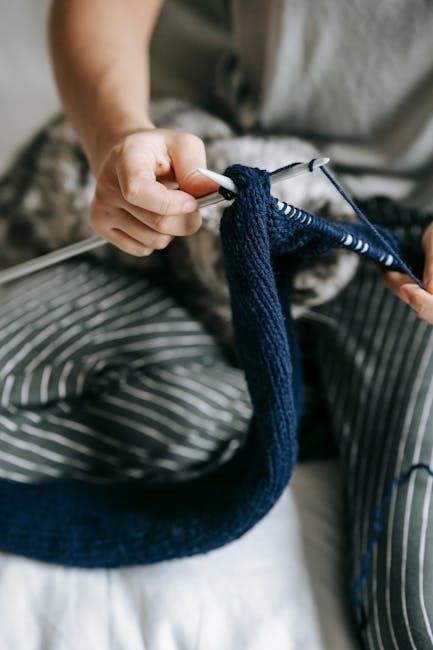
Needlepoint‚ fundamentally‚ is the art of decorative stitching using yarn through an open-weave canvas․ Unlike cross-stitch which creates distinct ‘X’ shapes‚ needlepoint stitches cover the canvas‚ creating a solid‚ textured surface․ It’s a remarkably versatile craft‚ allowing for a wide range of designs‚ from simple geometric patterns to incredibly detailed pictorial scenes․
The process involves using a needle to pull yarn through the holes of the canvas‚ creating various stitches․ These stitches aren’t just about filling space; they contribute to the overall texture and aesthetic of the finished piece․ Different stitch types‚ like the Basketweave‚ Gobelin‚ or Corduroy stitch‚ offer unique visual and tactile qualities․
Needlepoint differs from other embroidery forms in its reliance on the canvas structure․ The canvas provides the foundation‚ and the stitches are worked into it‚ rather than creating the structure itself․ This makes it ideal for larger projects and allows for a more durable and substantial finished product․
History of Needlepoint
Needlepoint’s roots stretch back centuries‚ evolving from earlier embroidery techniques practiced in ancient civilizations․ During the medieval period‚ it flourished within monasteries‚ adorning religious vestments and altar cloths with intricate designs․ Noble households embraced needlepoint‚ utilizing it to create tapestries‚ cushions‚ and decorative wall hangings‚ showcasing wealth and artistry․
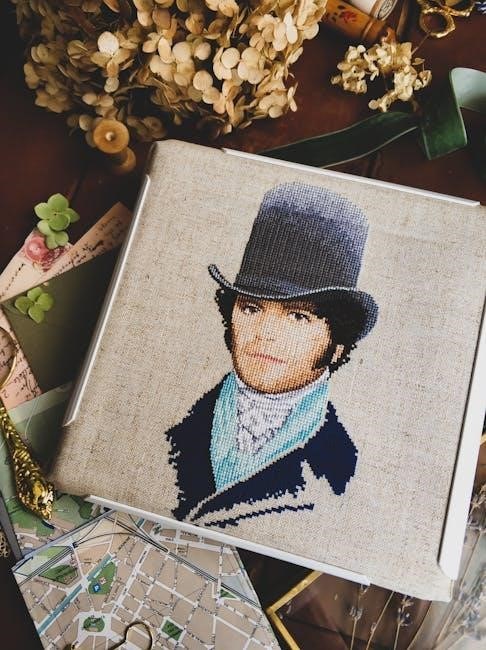
The Renaissance saw needlepoint become a popular pastime among the upper classes‚ with elaborate designs often depicting mythological scenes or family crests․ As trade routes expanded‚ new materials like silk yarn became available‚ enriching the craft’s possibilities․ By the 17th and 18th centuries‚ needlepoint was a staple skill for women‚ demonstrating refinement and domesticity․
Throughout the Victorian era‚ needlepoint experienced a revival‚ with a focus on detailed floral motifs and sentimental scenes․ Today‚ it continues to thrive as a beloved hobby‚ blending tradition with contemporary creativity․
Materials Needed for Needlepoint
Embarking on a needlepoint journey requires a few key supplies․ First‚ you’ll need canvas – available in various counts determining hole size‚ influencing stitch detail and project speed․ Yarn is crucial; traditional Persian wool offers durability‚ while silk yarn provides a luxurious sheen․ Crewel yarn or embroidery floss are ideal for finer details․
Essential tools include needles‚ specifically tapestry needles with blunt tips to avoid splitting canvas threads․ Sharp scissors are vital for precise yarn trimming and canvas preparation․ A frame or stretcher bars keep the canvas taut during stitching‚ preventing distortion․ Optional‚ yet helpful‚ are a yarn cutter‚ a needle threader‚ and a magnifying glass for intricate work․
Choosing quality materials ensures a satisfying and long-lasting needlepoint creation․
Understanding Needlepoint Canvas
Needlepoint canvas varies in hole size‚ categorized as petit point (fine)‚ gros point (larger)‚ and quickpoint (extra-large)‚ impacting stitch detail and project duration․
Canvas Count: Petit Point‚ Gros Point‚ and Quickpoint
Canvas count significantly influences the final appearance and time commitment of a needlepoint project․ A canvas with 16 to 20 holes per inch is considered very fine‚ categorized as petit point needlepoint․ This requires meticulous work and is ideal for highly detailed designs‚ but naturally takes considerably longer to complete․
Conversely‚ a canvas featuring between 8 and 16 holes per inch falls into the gros point needlepoint category․ The larger holes facilitate faster stitching‚ making it a popular choice for projects where speed is desired without sacrificing substantial detail․ It strikes a balance between intricacy and efficiency․
Finally‚ canvases with 7 holes per inch or fewer are classified as quickpoint needlepoint․ These extra-large holes allow for incredibly rapid completion‚ perfect for beginners or those seeking a quick and satisfying project․ While detail is limited‚ the speed and ease of use are appealing․
Canvas Materials
Needlepoint canvases are traditionally constructed from stiffened fabric woven with evenly spaced holes‚ providing a foundation for stitching․ These canvases aren’t merely fabric; they’re engineered to withstand the repeated piercing of the needle and the tension of the yarn․
Historically‚ canvas was often made of linen‚ prized for its durability and even weave․ However‚ modern needlepoint utilizes a variety of materials‚ including cotton‚ and synthetic blends․ These alternatives offer varying degrees of stiffness and texture‚ influencing the final project’s drape and feel․
The canvas is typically pre-printed with a design‚ guiding stitch placement․ However‚ blank canvases are also available‚ allowing for complete creative freedom․ The quality of the canvas directly impacts the stitching experience and the longevity of the finished piece․
Essential Needlepoint Stitches
Mastering fundamental stitches unlocks a world of needlepoint possibilities‚ from the classic Basketweave to the textured Gobelin and versatile Corduroy stitches․
Basketweave Stitch
The Basketweave Stitch is a cornerstone technique in needlepoint‚ celebrated for its simplicity and ability to create a smooth‚ durable finish‚ ideal for larger projects․
Orientation: Begin in the upper right-hand corner of the designated area‚ establishing a consistent starting point for a neat and uniform appearance․
Direction: Work diagonally across the canvas‚ meticulously stitching over and under the canvas threads to emulate a woven effect‚ building the foundation of the stitch․
Progress: Continue this pattern‚ diligently alternating directions with each row to maintain a consistent weave‚ ensuring a balanced and aesthetically pleasing texture․
This stitch provides a flat surface‚ making it excellent for backgrounds or areas where texture isn’t desired‚ offering a classic and reliable needlepoint solution․
Basketweave Stitch ⏤ Orientation
Establishing proper orientation is crucial for a polished Basketweave Stitch․ Always initiate your stitching journey in the upper right-hand corner of the area you intend to cover with this technique․
This consistent starting point ensures uniformity throughout your needlepoint piece‚ contributing to a professional and visually appealing final product․
Consider the overall design when determining your starting point; aligning with the design’s flow will enhance the aesthetic harmony of your work․
Maintaining this upper right-hand corner approach prevents inconsistencies and ensures that the woven texture appears balanced and even across the entire stitched area․
A clear understanding of orientation simplifies the stitching process and minimizes potential errors‚ leading to a more enjoyable and successful needlepoint experience․
Basketweave Stitch ─ Direction
To achieve the classic woven effect of the Basketweave Stitch‚ work diagonally across the canvas‚ meticulously stitching over and then under the canvas threads․
This alternating pattern is the core of the stitch‚ creating the illusion of interlaced fibers‚ much like a woven basket․
After completing a diagonal row‚ shift your direction and repeat the over-and-under technique‚ working in the opposite diagonal direction․
Consistent alternation is key; each row should mirror the previous one in direction‚ ensuring a balanced and symmetrical weave․
This methodical approach builds the texture gradually‚ resulting in a flat‚ smooth‚ and remarkably durable finish ideal for larger needlepoint projects․
Remember to maintain even tension throughout‚ preventing puckering or distortion of the canvas․
Basketweave Stitch ⏤ Progress
As you continue the Basketweave Stitch‚ diligently maintain the alternating diagonal pattern‚ row by row‚ building upon the foundation you’ve established․
Each successive row should seamlessly integrate with the previous one‚ reinforcing the woven texture and expanding the stitched area․
Pay close attention to keeping your tension consistent; this prevents any unwanted warping or puckering of the canvas as you progress․
Regularly step back to assess your work‚ ensuring the stitch remains even and the design is developing as intended․
The methodical repetition of the diagonal over-and-under technique gradually fills the canvas‚ creating a robust and visually appealing surface․
With each completed row‚ the Basketweave Stitch reveals its inherent beauty and durability‚ making it perfect for extensive projects․
Gobelin Stitch
The Gobelin Stitch is celebrated as a versatile and decorative needlepoint technique‚ renowned for its ability to introduce captivating texture and visual depth to any project․
This stitch involves bringing the needle up through the canvas‚ then looping the yarn around to create a small knot on the surface before proceeding to the next stitch․
Before fully pulling the thread through‚ carefully re-insert the needle a short distance along the stitching line‚ nestled within the loop formed by the thread․
Gently tighten the loop against the fabric‚ ensuring a secure and defined stitch; repeat this process consistently for a uniform appearance․
The Gobelin Stitch is particularly well-suited for detailed designs and areas where a raised‚ textured effect is desired‚ adding a unique dimension․
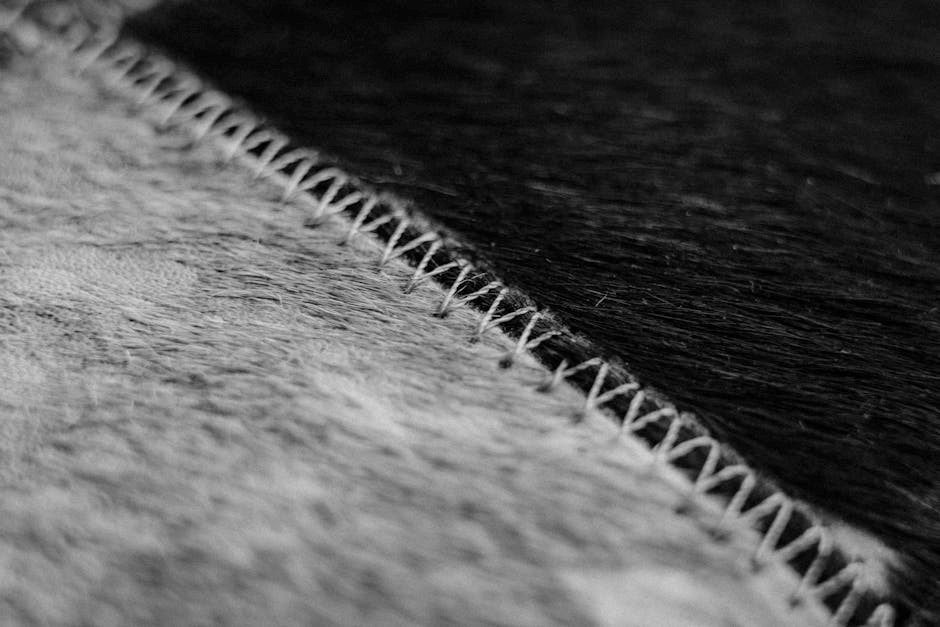
Corduroy Stitch
The Corduroy Stitch‚ aptly named for its resemblance to the fabric of the same name‚ is a fantastic choice for projects desiring a subtly textured‚ ribbed appearance․
This stitch is particularly effective when creating designs that mimic woven materials‚ making it ideal for garments like sweaters or textured backgrounds in landscapes․
The technique involves working rows of straight stitches close together‚ creating parallel lines that evoke the characteristic ridges of corduroy fabric․
To execute the stitch‚ bring the needle up and down along a line‚ ensuring each stitch is consistently sized and spaced for a uniform texture․
Its applications extend beyond clothing; consider using it for adding detail to cushions‚ bags‚ or any project where a tactile‚ dimensional effect is desired․
Corduroy Stitch ⏤ Technique
Begin by bringing the needle up at one end of your desired stitch length; Then‚ insert the needle back down a short distance away‚ creating a straight stitch along the canvas․
Crucially‚ bring the needle up again very close to where the previous stitch ended‚ but slightly to the side‚ maintaining consistent spacing between each stitch․
Continue this process‚ working rows of parallel stitches‚ ensuring each stitch is the same length and tension for a neat‚ uniform corduroy effect․
The key is to keep the stitches tightly packed together‚ mimicking the ribbed texture of corduroy fabric; avoid gaps or unevenness․
Remember to consistently insert the needle inside the loop formed by the thread before tightening‚ ensuring a secure and textured finish․
Corduroy Stitch ─ Applications
The Corduroy Stitch excels in projects demanding a tactile‚ fabric-like texture‚ perfectly mirroring the namesake material’s ribbed appearance․
Notably‚ this stitch is exceptionally well-suited for creating realistic clothing items within needlepoint designs‚ such as sweaters‚ jackets‚ or trousers․
Beyond apparel‚ consider utilizing the Corduroy Stitch for backgrounds‚ adding depth and visual interest to landscapes or interior scenes․
Its robust nature makes it ideal for areas requiring durability‚ like cushions‚ pillows‚ or even small rugs‚ resisting wear and tear․
Experiment with varying yarn weights and colors to achieve different corduroy effects‚ from subtle textures to bold‚ pronounced ribs․
Furthermore‚ the stitch’s linear quality lends itself to outlining shapes or defining patterns‚ offering a unique design element․
Yarn Choices for Needlepoint
Selecting yarn is crucial; Persian wool is traditional‚ silk offers luster‚ and crewel yarn or floss suits detailed projects beautifully‚ providing varied textures․
Persian Wool Yarn
Persian wool yarn remains the cornerstone of traditional needlepoint‚ celebrated for its exceptional durability‚ rich color palette‚ and luxurious texture․ This yarn is derived from sheep raised in Persia (modern-day Iran)‚ known for producing a particularly long and lustrous fiber․
Its inherent strength makes it ideal for projects intended for heavy use‚ such as upholstery or floor coverings‚ ensuring longevity and resistance to wear․ The wool accepts dye beautifully‚ resulting in vibrant and lasting colors that won’t fade easily over time․
Needlepointers appreciate its slightly rustic appearance‚ which adds character and depth to finished pieces․ While generally more expensive than other yarn options‚ the quality and enduring beauty of Persian wool make it a worthwhile investment for heirloom-quality needlepoint projects․ It’s a classic choice for a reason!
Silk Yarn
Silk yarn offers a luxurious sheen and incredibly soft texture‚ making it a popular choice for needlepoint projects where elegance and refinement are desired․ Sourced from silkworm cocoons‚ silk fibers possess a natural luster that catches the light beautifully‚ adding a sophisticated touch to any design․
While not as durable as Persian wool‚ silk is perfect for decorative pieces like cushions‚ wall hangings‚ or smaller accessories that won’t endure heavy wear․ It’s particularly well-suited for detailed work‚ as its smooth texture allows for precise stitching and intricate patterns․
Silk yarn is available in a stunning array of colors‚ often with a subtle variation in tone that adds depth and dimension․ It’s a more delicate and expensive option‚ but the resulting beauty and tactile experience are well worth the investment for special projects․
Crewel Yarn and Embroidery Floss
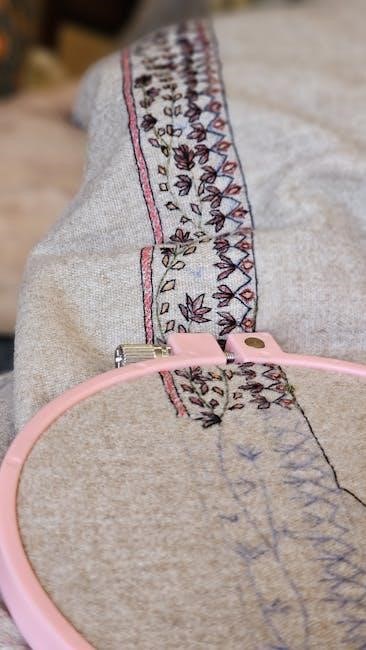
Crewel yarn and embroidery floss are excellent choices for needlepoint projects demanding exceptional detail or smaller-scale designs․ These finer yarns allow for intricate work‚ perfect for delicate floral motifs‚ detailed landscapes‚ or miniature portraits within your needlepoint canvas․
Crewel wool‚ a fine‚ two-ply yarn‚ provides a slightly textured finish‚ while embroidery floss‚ typically made of cotton‚ offers a smoother‚ more polished look․ Both are ideal when working with canvases featuring a high hole count‚ such as petit point‚ where precision is key․
Due to their thinner nature‚ these yarns require more careful handling and may take longer to complete larger areas․ However‚ the resulting level of detail and artistic expression makes them invaluable tools for the discerning needlepointer․
Needlepoint Tools
Essential tools include needles in various sizes‚ selected based on canvas count and yarn weight‚ and sharp scissors for precise yarn trimming and fabric cutting․
Needles
Needlepoint needles differ significantly from standard sewing needles‚ being larger with a rounded point to avoid splitting the canvas threads․ They feature a large eye‚ facilitating easy threading with thicker yarns commonly used in needlepoint projects․
Needle sizes are numerically designated; lower numbers indicate larger needles‚ and higher numbers signify smaller ones․ Selecting the correct needle size is crucial for achieving optimal results․ A general guideline suggests pairing a size 24 needle with 10-count canvas‚ a size 26 with 12-count‚ and a size 28 with 14-count․ For finer canvases like petit point (higher than 16-count)‚ even smaller needles‚ such as size 30 or 32‚ may be necessary․
Tapestry needles are the most common type used in needlepoint‚ as their blunt tips glide smoothly between canvas threads without causing damage․ Maintaining a selection of needle sizes ensures you’re prepared for various canvas counts and yarn weights‚ enhancing your stitching experience and project outcomes․
Scissors
Scissors are an indispensable tool for any needlepointer‚ serving multiple purposes throughout the creative process․ While any scissors can be used‚ specialized options significantly enhance efficiency and precision․
Small‚ sharp embroidery scissors are ideal for meticulously trimming yarn ends close to the canvas‚ preventing unsightly bulkiness and ensuring a clean finish․ Larger scissors are useful for cutting yarn lengths from skeins or balls‚ preparing them for stitching․ Some needlepointers prefer stork-billed scissors‚ known for their long‚ slender blades‚ which are particularly effective for navigating dense stitching areas․
Maintaining dedicated scissors solely for needlepoint prevents dulling from cutting paper or fabric‚ preserving their sharpness․ Regularly cleaning and oiling your scissors ensures smooth operation and extends their lifespan‚ making them a reliable companion for countless projects․
Advanced Needlepoint Techniques
Half Cross Stitch and Continental Stitch elevate needlepoint artistry‚ offering texture and design possibilities beyond basic stitches for skilled crafters․
Half Cross Stitch
Half Cross Stitch is a versatile technique‚ often used as a foundation for more complex designs or to add subtle texture to a needlepoint project․ It’s essentially one half of a complete cross stitch‚ creating a diagonal line of stitches across the canvas․
To execute this stitch‚ bring the needle up through a hole in the canvas and then down diagonally across to an adjacent hole․ Repeat this process‚ always working in the same diagonal direction‚ to build a row of half stitches․ This technique is particularly useful for shading or creating a broken color effect․
Unlike a full cross stitch‚ the half cross stitch doesn’t fully cover the canvas‚ allowing the canvas background to subtly show through‚ which can add depth and visual interest․ It’s a fantastic option when you want a less dense‚ more airy look to your needlepoint piece․
Continental Stitch
Continental Stitch is a popular and efficient needlepoint stitch‚ known for its speed and ability to cover large areas of canvas quickly․ It’s a slanted stitch worked diagonally across the canvas‚ creating a textured surface with a distinctive visual appeal․
Begin by bringing the needle up through a hole and then taking it diagonally down into the adjacent hole․ Continue working in rows‚ always maintaining the same diagonal direction․ Each stitch should be placed closely beside the previous one‚ creating a dense‚ consistent pattern․ The direction of the slant can be adjusted to create different visual effects․
This stitch is excellent for backgrounds‚ filling in large shapes‚ or creating a textured effect․ It’s a foundational stitch for many needlepoint projects‚ offering both speed and a beautiful‚ classic look․
Finishing Your Needlepoint Project
Blocking ensures your completed needlepoint lies flat‚ while mounting and framing beautifully displays your artistry‚ preserving it for years to come․
Blocking
Blocking is a crucial final step in needlepoint‚ ensuring your finished piece lays perfectly flat and showcases the stitches beautifully․ After completing your stitching‚ gently remove the canvas and any marking tools․ Moisten a clean cloth with lukewarm water – avoid soaking the needlepoint directly․
Lay the needlepoint face up on a clean‚ padded surface‚ like a towel-covered ironing board․ Gently press the damp cloth over the surface‚ using a cool iron setting (no steam!)․ The heat helps relax the yarn and canvas‚ allowing them to settle into their final shape;
Pin the needlepoint to the blocking board‚ stretching it gently to the desired dimensions․ Allow it to dry completely‚ which may take several hours or overnight․ Proper blocking corrects distortions and creates a professional‚ polished finish‚ ready for mounting or framing․
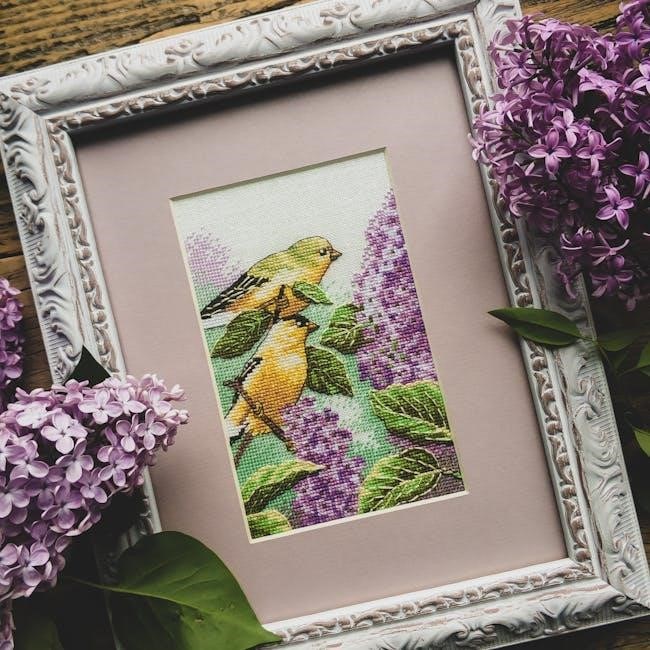
Mounting and Framing
Mounting and framing protect your finished needlepoint and display it elegantly․ Several options exist‚ depending on your preference and the project’s size․ Traditional stretching involves securing the needlepoint around a wooden frame‚ creating a taut‚ drum-like surface․
Alternatively‚ needlepoint can be mounted onto a rigid backing board‚ offering a flatter presentation․ Acid-free materials are essential to prevent discoloration over time․ Professional framers specialize in needlepoint finishing‚ ensuring a seamless and durable result;
Consider a mat board to enhance the design and provide visual breathing room․ Choose a frame that complements the colors and style of your needlepoint․ Proper mounting and framing preserve your artwork for generations‚ showcasing your dedication and skill․